The use of sequencers within synth-patches is nothing new, but it can be a contentious topic. As we’re scrolling through the myriad presets that accompany most commercial synth plugins, chances are that you’ll happen upon a collection of pre-ordained sequences, wherein somebody else’s composition could be implanted on your own.
Leaving the issue of copyright to one side, we can be far more creative by programming our plugins to play a rhythm that we decide, allowing us to imprint our own chord sequence on our tracks. This was commonplace even in the earlier days of the commercial use of synthesisers.
The track Let Me Go by Heaven 17, relied on the hypnotic and thoroughly effective use of a CV sequencer to provide both rhythm and alter filter-cutoff position. Any software plugin synth with an inbuilt sequencer can generate a rhythm specified by you. The net gain is an exceptionally tight pattern that locks perfectly to your track and DAW.
Our very own BazilleCM synth plugin is a fine example, with its versatile 16-step sequencer, accessed from the bottom of the plugin window. This synth plugin comes free with every issue of Computer Music magazine, along with a bundle of other plugins called the CM Plugin Suite.
The capable nature of BazilleCM's sequencer can extend way beyond simple rhythmic duties, but this is a perfect place to get started. Despite being modular in design, it’ll even allow you to play polyphonically. So grab your copy of BazilleCM and let’s dive in.
Make a sequencer polysynth patch in BazilleCM
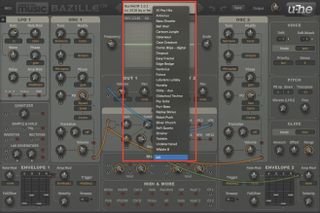
We’ll begin by initialising a patch within BazilleCM. Open up your DAW and load up the BazilleCM plugin. Once the plugin window is open, move to the central display at the top of the window, click to reveal the drop-down menu, and select ‘init’ from the bottom. This will initialise the patch.
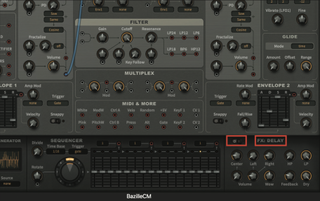
As part of the initialisation, you’ll also hear the FX Delay active in the signal. To make our adjustments clearer, go to the Delay section (bottom right) and move the switch to the ‘off’ position. We’ll switch it on again later. Remember, any time you make an adjustment to a setting or pot, a numeric value will appear in the upper display.
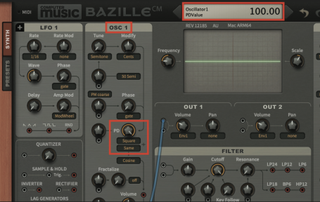
We’ll start creating our patch by moving to the OSC1 section. Move halfway down the oscillator strip, and change the first PD waveform to a Square wave. Leave the lower wave set to ‘Same’. Then increase the PD pot to its absolute maximum setting of 100. The resultant tone should be full and bright.
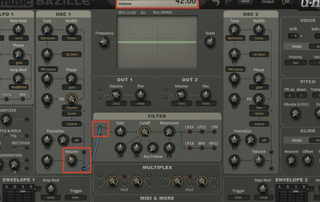
Move to the bottom of the OSC1 strip and locate the volume pot. Set this to a value of 42. Then we need to patch OSC1 into the filter section. Locate the connected patch cable, currently connected to OUT 1, and disconnect the cable by clicking and holding on it. Redirect this cable to the upper filter input.
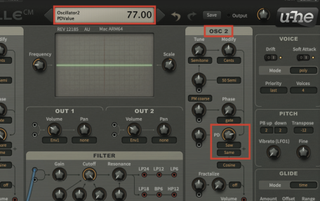
Now move across to OSC2; ensure that halfway down the oscillator strip, you have Saw selected, with ‘Same’ displayed underneath. Then adjust the phase distortion (PD) pot, setting it to a value of 77. This should provide another very full and relatively bright tone within our patch.
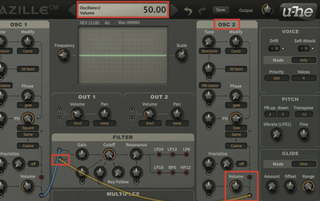
If you try playing the patch now, you won’t hear any noise. We need to connect the LP6 output, from the filter section, to the input of OUT 1. Once you have made this connection, you should be able to hear the patch, which will be sounding very bright. Adjust the filter cutoff pot, setting it to a value of 16.
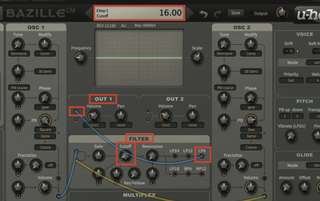
If you try playing the patch now, you won’t hear any noise. We need to connect the LP6 output, from the filter section, to the input of OUT 1. Once you have made this connection, you should be able to hear the patch, which will be sounding very bright. Adjust the filter cutoff pot, setting it to a value of 16.
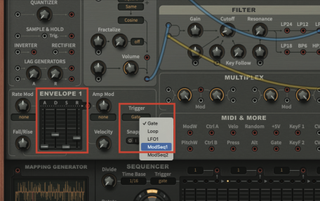
It’s now time to adjust our Envelope settings; beginning with Envelope 1, set the Trigger mode to ModSeq1, from the drop-down menu. This will invite the sequencer to trigger the envelope. Then set the Attack fader to a value of 1, Decay to 32, Sustain to 0, and finally Release to 24.
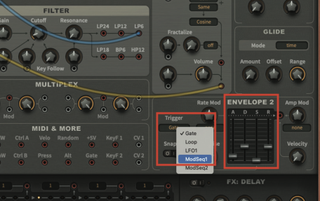
Move across to the Envelope 2 section; set the Trigger mode to ModSeq1, from the drop-down menu. This envelope will also be communicating with the sequencer, however we will be using it to control filter cutoff instead of amplitude. Set the Envelope Attack fader to a value of 10, Decay to 34, Sustain to 0, and finally Release to 33.
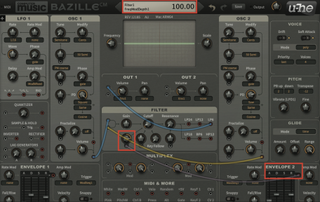
In order to allow Envelope 2 to control the filter cutoff, patch a cable from the Envelope 2 output, to one of the filter modulation pots. There are two to choose from, both located on the lower left-hand side of the filter section. Once connected, set the modulation pot to a value of 100.
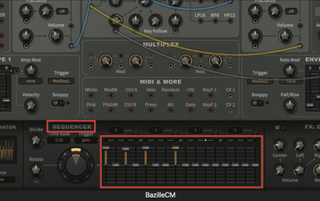
Move to the Sequencer section at the bottom of the window, and turn up faders 1, 3, 5 and 8. These only need to be turned up by a single increment, but moving the faders to the top will give a clearer indication of their activation. Each sequencer step represents a triggered note, so you can experiment with your own rhythms.
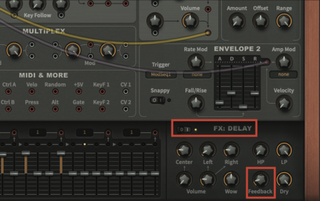
As this patch is incredibly rhythmic, the presence of on-board delay can certainly add a further element to the sound of this patch. Move back to the FX: Delay section, and switch the delay line back on. You might want to reduce the Feedback pot, so that the delay does not extend too far over time.
Pro tip: onboard delay or nay?
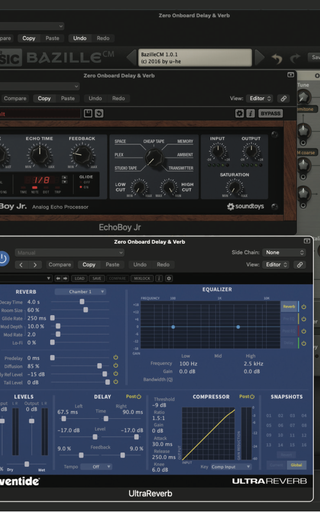
Many of the commercial plugin synthesisers that we use today are equipped with various forms of onboard effects processing. Given the wealth of effects that are contained within each and every DAW, it does rather beg the question: is onboard processing really required?
At first sight, the presence of onboard effects can substantially broaden the scope of a patch. Adding distortion, compression, or even delay and reverb, can always provide an extra little bit of polish to a sound. But this can also be a distraction.
In the professional realm, it would always be the preference to eliminate effects from a synthesiser patch
In the professional realm, it would always be the preference to eliminate effects from a synthesiser patch, unless it is an intrinsic part of the sound, which could certainly be the case for distortion or similar. Effects processing, such as reverb and delay, is often better served as a later addition, as any channel compression applied to the sound would also be applied to the reverb or delay, and might not be the effect required. Above all, the options are there to apply at source, or not, and which way you may decide to go should be entirely dictated by your preference at the mix stage.
Recommended listening
1. Calvin Harris & Rihanna - This Is What You Came For
The repetitive chords that run throughout this tune could easily have been triggered using this on-board sequencer method.
2. Caribou - Honey
The punchy and continuous synth chords that populate much of this classic track would be easily created using onboard sequencer triggering.


