Delivers some of the most detailed automatic and manual human tuning plus 'that' synthetic sound
Type: Automatic tuning plugin
Key features: Automatic or manual tuning of vocals or other audio, pitch edit graph with waveform overview, timeline, piano roll and pitch editor, 3 timeline modes including bars/beats, minutes/seconds and samples, Vibrato section
System requirements: AAX/AU/VST3 (64-Bit), Mac OSX 10.15 or later, Windows 10 or later; 8 GB RAM
Buy from Waves
Waves Tune is a plugin that makes vocal tuning - or any other instrument tuning, come to that - very easy to do. You can use it to make automatic adjustments to your tuning by setting the overall key and scale, or get in there and make precision editing yourself, note by note.
And yes, you can even create the hard 'robotic style' automatic tuning so popular in contemporary music production. That said, in our Waves Tune vs Antares Auto-Tune comparison, we praised the Waves plugin for its more natural and human style tuning above its hard 'Auto-Tune' style character - this is very much a plugin aimed at more realistic and 'invisible' tuning.
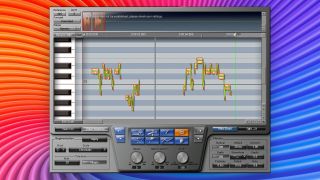
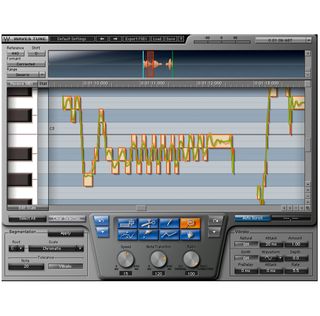
Waves Tune is dominated by a central window as you can see in our annotated screen grab, which shows the vocal (or other audio) being processed. The audio is laid out as notes across a virtual keyboard, and editing is done according to a global scale that you can set, or by dragging and dropping chunks of audio. You can zoom in and out to tweak precise tuning levels like vibrato for even more natural-sounding results.
In this feature we're highlighting six ways to get more out of Waves Tune, looking at some quick tips and shortcuts to perfect - or indeed make more robotic - vocal tuning.
First we'll look at the main screen of Waves Tune and then we'll dive into our six quick tip shortcuts.
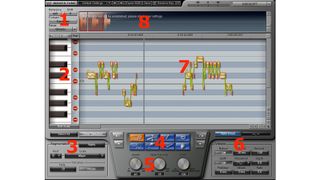
1. Global correction: Controls to set overall reference pitch, range (bass, baritone, soprano), formant correction (for more natural tuning) and global pitch shift (to apply on all scanned audio).
2. Piano roll: You can use this to play reference notes and it's also useful to see which notes are allowed or not (marked with the red 'minus' icon) in your set scale.
3. Segmentation section: This sets the tuning 'rules' and you can select the root, scale and vibrato and how strictly Waves Tune adheres to these rules.
4. Graphic tools: Select for various tuning edits. With these, you can go as detailed as you like, making very natural or unnatural edits to your audio.
5. Correction parameters: For overall editing of the note transition and speed, and these can set the 'robotic-ness' of the tuning which can be increased if they are at a minimum.
6. Vibrato section: To set either synthetic or natural vibrato and the shape and nature of the vibrato waveform - another useful area to help create more natural or unnatural tuning detail.
7. Pitch edit area: Light orange shows the original pitch detected of the scanned audio, and green the automatically corrected pitch.
8. Waveform overview: Shows the global overview of all audio in the track or the edit window overview i.e. that of the audio in the main edit window.
- Explore more of the best Waves vocal plugins
- The Waves plugins we rate overall
Six ways to get more from Waves Tune
1. Use the virtual keyboard
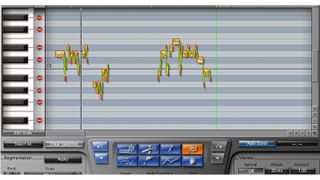
The virtual keyboard is not just there to line up with the audio and show you which notes Waves Tune is playing; it is also there to show you which notes you should be avoiding, according to the selected song key. It has minus signs on these 'illegal notes' and while you can ignore this advice, break 'the law' and move notes onto these, it is a very good visual clue on what your big tuning issues might or might not be.
The other great use of the keyboard is simply to play notes, so you can use it as a reference source. Be warned that in some DAWs you will need to arm the channel 'record' option to hear it.
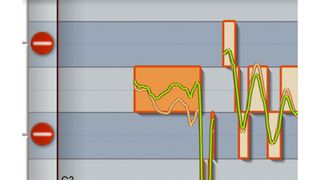
2. The middle is good… most of the time
With Waves Tune, you set up the overall key of your song and the display will show you (in orange) the notes sung. A green line displays the suggested tuning position and the next time you play it, the pitch correction adjusts to this green line. Generally speaking, the more this green line approaches the middle of the block it sits in, the more 'in tune' it is. As we'll see in tip 5, when we use harder, more robotic tuning, the green line sits squarely in the middle of a block.
When you edit individual notes, then, you want to aim towards the middle when pushing the green line as that is where the note is most in tune and least flat, but the beauty of Waves Tune is that there are several ways of doing this to make the results more natural or unnatural.
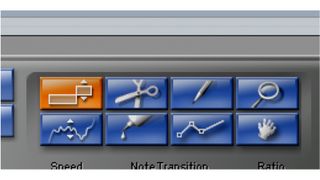
3. Know your tools
The main area at the bottom of Waves Tune has eight tools which you can choose from. These are crucial devices for either fast or slow editing of your tuning, and you need to make sure you know what each one does.
From left to right, these tools are: note for shifting audio blocks from note to note; slice for separating or splitting notes; pencil for drawing in your own pitch; zoom for zooming in and out on your audio (use Option on a Mac or Alt on Windows to zoom out); curve for moving pitch in a more continuous motion; merge for joining notes together; line, similar to pencil but tunes in straight lines; and finally hand for navigating around the window.
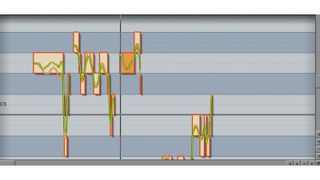
4. Curve for natural, line for unnatural
You use the curve tool (bottom left) to make more gentle edits to your vocal tuning, in order to make them less flat. It allows you to keep the original curve in the audio, by simply moving it up and down. While you focus on specific parts of the audio, it preserves this original curve - hence the name - so keeping more of the character and the up-and-down vibrato.
The line tool is a bit more brutal as it draws straight lines so can be used to get more unforgiving and robotic tunings, but, as we'll see, can also be used in the opposite way! (see tip 6).
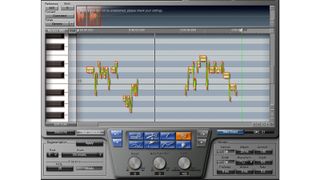
5. The fast and hard way to automatic tuning
While Waves Tune is better for classic, natural tuning, it is easy to get the more Auto-Tune style result out of it very quickly. Simply dial both the Speed and Transition dials to a minimum and your audio will tune very fast.
You'll notice that the tuning lines become flat and square as the transition becomes so fast to take place. It will add the famous robotic sound to your audio which you can hear in this example.
6. Go more or less automated with the line tool
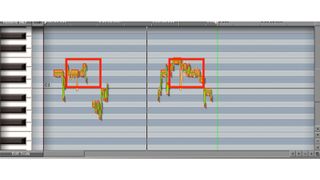
The line tool is a great weapon to deploy if you either want more robotic tuning or a bit less. It essentially just draws a straight line for your tuning and as we discovered above can make tuning harder and more robotic in this way. But you can also use it on this kind of tuning to lessen the effect by drawing diagonal lines between hard-tuned notes as we have done with our audio.
We have simply drawn diagonal lines to join three of the hard-tuned vocals up - shown within the two red boxes on the screen. These give these hard tunings a softer edge so it's not quite as brutally robotic in places, which can add some great variation to an overly automated tuned vocal line.
Conclusion
With Waves Tune you can really get in and do very detailed editing, shifting notes, adding different levels of vibrato and going for that hard, automatic, robot-style tuning. Where it differs from some tuning plugins is that you can be as 'invisible' as you like - where no-one would realise anything had been tuned - or go full-on T-Pain or Cher with the effect.
It doesn't do very much beyond these but nor should you expect it to - the clue is in the name. It also has quite a dated-looking interface, but don't let that fool you. Tune has a sleek workflow, delivers excellent results however you decide to use it, and is one of those plugins that Waves usually offers with big discounts, so grab it in a sale and add it to your vocals. You won't regret it!
