RECORDING WEEK 2023: Music-making can be an expensive business. Even the most rudimentary software production setup requires some significant investment – a laptop, an interface, a pair of monitors or at-least some half-decent headphones.
Even if you’re being thrifty, those items alone aren’t likely to leave you much change from a grand. If you want a suite of the latest plugins, your bill will climb higher still. Taking the hardware route is even more of a drain on your finances; drum machines, polysynths, samplers, a modular system…
We’re not here to give you a guilt trip about your life choices though. Music creates happiness and what better thing is there to invest your hard-earned cash in than that? Our point, however, is that right now we’re all feeling the squeeze a bit. Between inflation, rising energy bills and squeezed wages, you might find that life is unfairly eating into your synth acquisition slush fund.
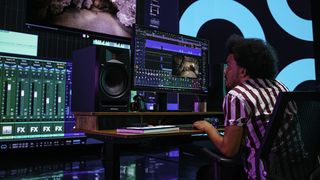
Like anything in life though, in music making, money isn’t the be-all-and-end-all. Having a top-of-the-line studio stuffed with expensive vintage hardware won’t suddenly make someone a great producer, and countless great records have been created over the years on cheap or minimal setups. Necessity is the mother of invention, after all, and the histories of dance music and hip-hop have their roots in artists finding creative ways to work around the limitations of their resources.
That’s what this feature is all about: ways to maximise the potential of what you already have, or bulk up your music making arsenal without bankrupting yourself.
DIY studio
While the heart of your setup is the hardware or software you use to make music, the space around these things plays an equally important role in creating an inspiring and effective setup. From the desk where you work, to various studio accessories and the very shape and sound of your studio, having a properly setup space can vastly improve your quality of life.
If you have the cash, there’s a ton of excellent bespoke options out there, from custom studio desks to multi-level synth stands and top-quality acoustic treatments. But there are plenty of ways to achieve similar results using more affordable, commonly available items.
When it comes to making your studio sound better, there are plenty of things you can do for free
IKEA has long been a go-to destination for cost-conscious music makers, and while other sources of budget furniture are very much available, what makes the Swedish giant so handy for kitting out a studio is the modular approach the company takes to its product lines.
There are certain products that can be used wholesale in a studio context – many of the open clothes racks and shoe stands can be repurposed nicely as synth racks, and the Kallax series bookshelves are a classic for vinyl records. But many of the smaller accessories and elements can be equally as useful for adapting your space.
Laptop stands and desktop shelves make great platforms for synth modules, effect pedals and interfaces. Hooks designed for cookware can easily be repurposed to hold leads or headphones. The basic housing for a set of draws could even be repurposed as a rack for outboard or a modular system.
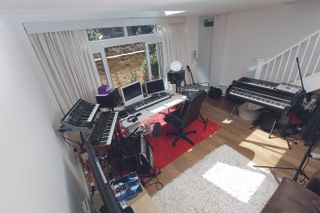
Of course, if you’re happy to get hands-on with some basic woodworking, there’s no end of quality ideas and instructional videos out there to help you build your own bespoke studio gear.
When it comes to making your studio sound better, there are plenty of things you can do for free to help the acoustics of your space. Carefully placing soft fabrics such as curtains, wall hangings and blankets around your room can help to absorb unwanted reflections. Similarly, objects like a good-sized bookcase placed against the wall directly opposite your speakers can help to minimise the effect of flat surfaces.
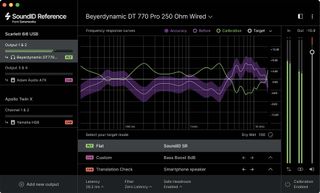
It’s worth reading up on optimal monitor placement and or using software like Sonarworks SoundID reference, which can help make the most of what you already have.
8 free ways to work smarter in the studio
1. Get sorted
Creativity and efficiency can be awkward bedfellows and it’s true that happenstance can sometimes lead you in creative directions you hadn’t envisaged. Still, being organised tends to reap benefits in the long run. In your hardware environment this could be as simple as ensuring all your equipment including cables, mics, headphones and so on are clearly labelled so that when you plug something up it’s quick and predictable.
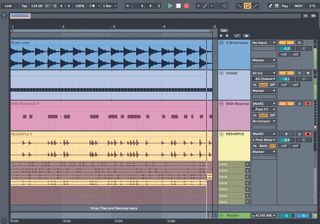
In the software domain it’s very easy for your system to become a fragmented web of content that can be slow to access from your DAW. It can be beneficial to organise your sessions and samples into separate folders or drives even, although be aware that moving files around can cause later problems when you try to open sessions, so proceed with caution.
Within your DAW, things should be a bit more straightforward and although each piece of software has its own way of organising plugins and content, there is typically some way to create favourites lists and tag specific types of files. Either way, getting all your regularly used tools into bespoke menus can be incredibly liberating and might also help you boot out stuff you never use.
2. Freebies
Free hardware might not be that easy to find, but free software certainly is, and whether you’re a PC or Mac user you can expand your toolset with some great free tools. You’ll find some of our recent favourites here, but there’s plenty more out there.
Start by checking the websites of developers you’re already registered with. You’ll often find basic or development plugins, soundsets or sample packs available for free. This is less commonplace for the big developers, but pretty much standard for smaller ones, so try those first. Or simply check out our many guides to free music software, free synth plugins, and free music samples.
3. Read the manual
Most of us produce music using DAWs that are immensely powerful, and grow ever more powerful with each update. Staying on top of these developments is tricky and chances are there are loads of untapped features in your DAW you’re not even aware of. Why not take a deep dive into your DAW manual and see what you’ve missed?
Try to establish the most efficient workflow for you, checking out any features that will speed up regular tasks. Or grab the version history to establish recent feature additions that appeal. If this sounds a bit dull, why not seek out some online DAW-specific tutorials? Either way, we’re sure you’ll find labour-saving or creativity-enhancing features that will add to your creative life and won’t cost you a thing.

4. Re-evaluate your hardware
We get used to focusing on the latest hardware and all it has to offer. But take time to look at what you already have and see if you can make better use of it. For example, if you have multiple inputs on your interface, why not get them all plugged up and ready for specific tasks – mic, line, instrument and so on?
You can apply the same technique to spare desk channels. Meanwhile, if you have under-used outboard, why not hook that up to your interface and assign it as a hardware insert, so it’s ready to roll when you need it?
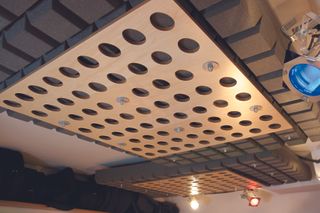
5. Acoustic treatment
Although it’s ideal to implement proper acoustic treatment, there’s a lot we can do that’s free. Carpet, rugs and curtains all reduce mid to high frequencies, but you can enhance this further with temporary screens around your performer. If resources are limited, focus your efforts behind the performer to control what enters the ‘on axis’ side of the mic.
6. Templates
Although each project we work on tends to be slightly different, there will usually be repeated aspects that we should be able to automate; and with any software-driven device this means we should be able to create a template.
This could be as simple as a routing preset on a mixing desk or a headphone cuemix setup on an interface. Or it could be complex like a full-on session layout on your DAW. So, if the gear has the facility and you find yourself setting things up in similar ways, create a template and save yourself some time.
7. Room analysis
If you regularly produce and create in the same space, the room acoustic forms an important part of that process. Few of us can afford extensive acoustic treatment, but even if we have zero budget to play with we can still analyse the space itself to establish which frequencies could be problematic.
And you never know, it might be possible to improve things simply by adjusting your recording, sitting or workstation position. Start with just the room measurements to get an idea of potential problem frequencies. Then if you have a decent mic to hand, why not do some proper real time analysis? For free software tools, check out Amroc and Room EQ Wizard.
8. Shortcuts
Most DAWs have icon-friendly operation that means anyone can use them without too much training. However, to become a power user you should really get to grips with keyboard shortcuts and although this may take a bit of time to master, it won’t cost you a thing.
Even if you only use them for regular tasks such as switching or launching windows, dropping into record, zooming in and out and so on, combining them with existing icon functions can seriously speed up your workflow.
